One of our friends asked me for a tutorial on how to cover a British-style rich fruit Christmas cake with marzipan and royal icing. So, this year, I took photos of the entire process...
The cake recipe I use, year after year, is the excellent Delia's Christmas cake. I usually make it early in November, then wrap it in foil, and put it in a cake tin out of the way. If I remember, I pour a tablespoon or two of brandy into little holes in the bottom a couple of times during the following six or seven weeks.
Then, about mid December, I unwrap it. Here it is, upside down:

Before putting icing on a cake like this, it's important to have something that stops bits of cake getting mixed up in the icing. Marzipan is the traditional first layer. I don't like it at all, but Richard does - and it certainly makes it easier to put icing on.
I've tried making my own marzipan, I've tried using Cypriot style almond paste.. but in my view, by far the easiest to handle is the English ready-to-roll marzipan that comes in boxes, and which can be found in the bigger Cyprus supermarkets during December. At a price... but hey, it's only once a year:

So. Remove the marzipan from the box, knead it a little, then roll it out on a surface dusted with icing sugar, using more icing sugar on the rolling pin. It should roll easily, and needs to be roughly in a circle which is the size of the cake, plus a couple of inches extra all round. Cypriot almond paste tastes better (in my opinion) but turns into a sticky mess when rolled.

Then, pick up the cake and dump it (still upside down) in the middle of the marzipan:

Note that many recipe books recommend using warmed apricot jam, brushed over the cake, to make the marzipan stick. I've done that sometimes, but as far as I can tell it makes no difference. This cake should be quite moist anyway, and the marzipan fits quite well so it doesn't matter if it doesn't fully stick. However, if you wish, warm a little jam, and then brush it lightly over the marzipan before putting the cake on it.
When the cake is in place, slide your hand underneath the marzipan, and flip the whole thing over, and onto a plate or serving dish:

Squash the side pieces in, so it fits around the cake. Pat it down, pushing it together if any little holes have appeared:

Then use a palette knife or similar to smooth it gently to remove any major bumps. I don't worry if it's still a bit bumpy:

Then put it in an airtight container to dry out a little for at least one day, preferably two or three.
Now comes the creative part. Perhaps.
Make a batch of royal icing. (Yes, that link was to one of my other blogs. Some of the photos are the same as on this one).
Pile the royal icing - or most of it - on top of the cake:

Use a knife to spread it roughly over the marzipan, and down the sides. It should be solid enough that it sticks easily without sliding down:

Pause in admiration at your cake, covered in gleaming white:

If you want to leave your cake rough-iced - in a theoretical imitation of snow - and then perhaps add on a few decorations you can then do something like this, which is what I did for our 2008 Christmas cake:

It's probably the simplest option. The effect around the sides was done by taking a knife and flicking the icing outwards.
However, this year I decided to put a little more effort into it. So I smoothed the top, as well as I could, using a (clean) ruler:

Then I ran a knife around the outside, with the aim of smoothing the edges:

I haven't really found how to do that properly. You can try using a wider knife, perhaps dipped in hot water. But my experience is that it simply removes more and more of the icing, eventually leaving it so thin that you have to pile more on and start the smoothing process again. So I don't aim for anything approaching perfection.
A couple of years ago, I came across the instructions for making a greaseproof paper icing bag - something I remembered from my high school domestic science classes. So, since I always find myself with left over royal icing after the smoothig process, I thought I'd try making a piping bag again this year.
It starts with a rectangle of greaseproof (or grease-free) paper, about 25 by 18.5 cm (10 by 7.5 inches):

Fold it so it looks like this:

Cut in half, along the longest edge of the triangles:

Now this is the bit I find tricky, but it's worth persevering. Move the papers so that the top points of the triangles are together. Then wrap one of the bottom corners around, so that the point lines up with the top points, something like this:

Of course, it's much easier if you're not trying to take a photo at the same time.
Now take the other bottom corner, and roll that up outside the first rolled bit of paper, so that all the points overlap, something like this:
There should be a fairly tight point at the bottom. If there's a hole, adjust it until it forms a fairly sharp point.
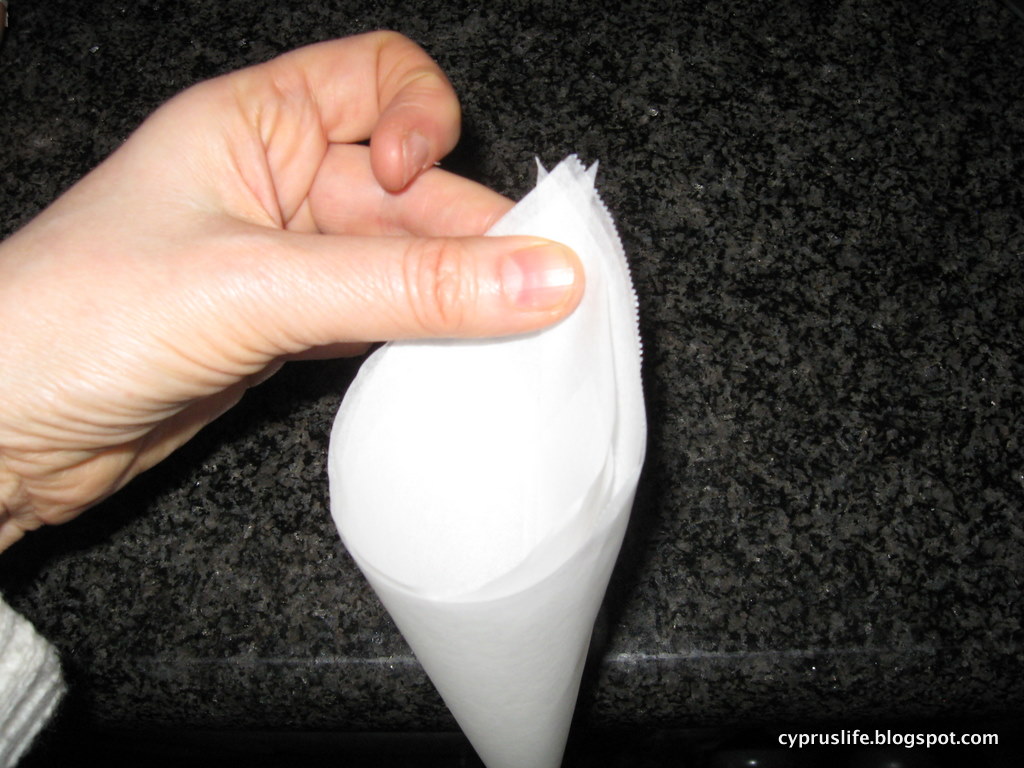
Then fold the back part tightly over, a few times, like this to secure the bag:

You can then just cut a tiny tip off the end, and use the bag for icing directly. But, like many people, I have a selection of plastic nozzles which have long outlasted their bought piping bag:

I don't know why these photos are a bit soft. I didn't discover that until I came to write this post, and I certainly wasn't going to go back and make another bag just for the sake of sharper pictures.
Anyway, the next step is to snip off the pointed end, and put a nozzle (if you have one) inside. I do this a little at a time until it fits rather like this - putting the simple nozzle with the small hole in:

So far, it's been like some basic origami. Now it gets messy...
Put a heaped tablespoon of royal icing inside the bag. It should be fairly solid, but if necessary beat in a little extra icing sugar.

Grasp the bag at the top, and push the edges together, gently pushing the icing down into the pointed end of the bag. From experience, I'm pretty sure it's impossible to do this without some of the icing seeping out of the top, all over your hand. But that's life - frequently messy, no matter how careful we are.
If you want to, you can experiment with icing on a plate, or your counter top, but this year I didn't want to waste any effort (or icing) so I got to work directly on the cake.

Two years ago, I did something rather like the Christmas cake I made at school, with a grid and some stars, and was quite pleased with the result, which looked like this:

Possibly I should have gone with what worked, and repeated the effort this year. But it was a lot of work, and besides, I wanted to do something different. I thought I'd keep it simpler, and use our plastic decorations again... so I stuck one in the middle, and piped lines going out of it. They weren't quite even, so I put a few more decorations at one edge. All rather random - and not at all helped by my sleeve dipping in the icing nearest to me at one point - but by the time the icing in the bag was used up, the cake looked like this:

The icing bag was a mess so, rather than trying to re-use it with a different nozzle, I made another and put a star-shaped nozzle in it. I did a few at the top, which looked all right - to make a little rosette shape, just push down the icing for a moment, then stop pushing and lift the bag away.
The sides looked rather a mess, so I tried a few stars there, but they didn't really work. I was running out of icing in the bag, too. And I was getting pretty fed up of my hands getting so messy, particularly as I had to keep washing at least one of them to take another photo:

This is what the icing bowl looked like, with the first icing bag abandoned inside:

Inspiration struck. Everyone needs a plan B. Here's how it works:
You need a small pot of glacé cherries, which you bought a week or two back, vaguely thinking they might come in useful:

Remove about eight of them from the pot, and using a sharpish knife, cut them into halves, as neatly as you can. Sixteen should be plenty.
Next, take a clean knife, and get as much of the spare royal icing out of the bowl, and swish it around the sides of the cake. Try not to disturb the effect on the top, but go for a rough-iced effect which is so much easier than the smooth one:

Start to stick glacé cherry halves on the side of the cake. Just do it by eye...
.. and then discover that sixteen halves was not nearly enough.

Take another five or six cherries out of the tub. Six is best, just to be on the safe side. Cut them in half. Continue around the cake until they're all done.
Discover that five extra would have been plenty, so eat the remaining cut cherries.
Take a look at the mess nearby:

Lick the spoon absent-mindedly, and then scrape out a bit more - you don't want to waste good food, after all.
When you've had enough, dump the whole lot in the washing-up bowl, quickly wipe the counter-top, and then leave it all to soak.
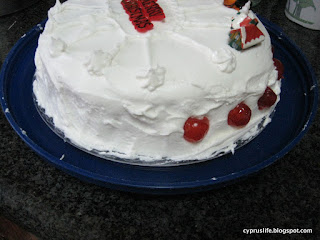
Take a photo of your completed cake:

This was the point at which I sighed inwardly, and realised that the cake I made last year, rough-iced and peaked without the hassle of icing bags, was actually just as effective and rather prettier:

2 comments:
I always think of you when baking the Christmas cake so was pleased to read your account of this year's decorating session. I used to do something similar to you but for the last (10?) years have cheated, but with better effect, and used circular ready-rolled marzipan and icing, making only a tiny amount of icing for any decoration on top (or even using ready-made!) http://www.silverspoon.co.uk/home/products/cakecraft/marzipan/ready-rolled-marzipan (the icing is similar). Both come rolled around a tube. Probably more expensive but much easier, and as you say only once a year :-)
Waw all your cakes look delicious and perfect! Well done!
Merry Christmas!
Post a Comment